Pic Collage: Take Your Pictures Up a Notch
As for the reason I ultimately chose Pic Collage for Kids over Paper 53? Well, first it was recommended to me. Work smarter, not harder. But additionally, it had one huge feature that Paper 53 just didn't have. While both apps allow you to draw freehand directly on the picture, Paper 53 does not allow you to add multiple text boxes onto a picture. In fact, the only typed text you can add is a title. Everything else you have to write by hand. And I don't know about your class, but my class already struggles enough with writing on large pieces of paper, so they definitely don't need the added struggle of trying to draw in teeny tiny letters on a photo.
Ready to learn how to use it? Let's get started.
First, download the free Pic Collage for Kids app. When you open the app, it'll look a little something like this:
Simply click the + button in the upper right hand corner to get started! When you do so, this screen will come up:
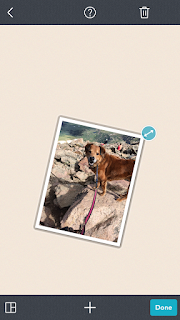
Next, click the photo icon to upload a single picture or multiples. For simplicity's sake, this step by step model will only use one picture. The picture I chose may or may not be of my own dog.
I wanted mine to be as large as possible, so I adjusted it accordingly.
Here's what my final product looked like:
Want to know how long that took? 5 minutes. What does this mean for you as a techie teacher? It means instead of giving your student a boring science reading followed by an even more painstaking diagram to label, you can let them explore the same content in a more meaningful way. Let them take a picture of the plant or animal you're studying! Don't have one in your class? Let them look for their own on a kid-safe search engine. Still nervous about using technology you're somewhat unfamiliar with? Start with this. Pic Collage for Kids. Your classroom full of eager little minds will thank you.


Comments
Post a Comment